OpenCV – warpAffine でアフィン変換を行う方法について
概要
OpenCV – 画像に適用するアフィン変換について では、画像に適用するアフィン変換について紹介しました。今回は OpenCV で画像にアフィン変換を適用する関数 cv2.warpAffine() について解説します。
cv2.warpAffine
アフィン変換行列を画像に適用するには、cv2.warpAffine() を使用します。
dst = cv2.warpAffine(src, M, dsize[, dst[, flags[, borderMode[, borderValue]]]])| 名前 | 型 | デフォルト値 |
|---|---|---|
| src | ndarray | |
| 入力画像 | ||
| M | ndarray | |
| (2, 3) のアフィン変換行列 | ||
| dsize | tuple of 2-ints | |
| 出力画像の大きさ | ||
| dst | ndarray | None |
| 出力画像を作成する際に使用する画像 | ||
| flags | int | cv2.INTER_LINEAR |
| 補間方法 | ||
| borderMode | int | cv2.BORDER_CONSTANT |
| 外挿方法 | ||
| borderValue | int or tuple of 3-ints | 0 |
| 外挿する値 | ||
| 名前 | 説明 | ||
|---|---|---|---|
| dst | リサイズ後の画像 | ||
使い方
M には、(3, 3) のアフィン変換行列のうち、3行目を除いた (2, 3) の行列を指定します。
dsize には出力画像の大きさを指定します。
import cv2
import numpy as np
from IPython.display import Image, display


def imshow(img):
    """ndarray 配列をインラインで Notebook 上に表示する。
    """
    ret, encoded = cv2.imencode(".jpg", img)
display(Image(encoded))def scale_matrix(sx, sy):
M = np.array([[sx, 0, 0],
[0, sy, 0]], dtype=float)
return M
# 画像を読み込む。
img = cv2.imread("sample.jpg")
h, w = img.shape[:2]
# x 方法に2倍、y 方法に2倍だけ拡大するアフィン変換行列
M = scale_matrix(sx=2, sy=2)
# 画像にアフィン変換行列を適用する。
dst = cv2.warpAffine(img, M, dsize=(w * 2, h * 2))
imshow(dst)
flags – 補間方法の設定など
InterpolationFlags 及び cv2.WARP_INVERSE_MAP の組み合わせを指定できます。
補間方法は次の種類があります。
- cv2.INTER_NEAREST: 最近傍補間
- cv2.INTER_LINEAR: バイリニア補間
- cv2.INTER_CUBIC: バイキュービック補間
- cv2.INTER_AREA: ピクセル領域の関係を利用したリサンプリング
- cv2.INTER_LANCZOS4: Lanczos 補間
また、cv2.WARP_INVERSE_MAP を指定した場合、アフィン変換行列 M は入力画像から出力画像の変換でなく、出力画像から入力画像への変換として解釈されます。
center = w / 2, h / 2
M = cv2.getRotationMatrix2D(center=center, angle=30, scale=1)

dst = cv2.warpAffine(img, M, dsize=(w, h))
imshow(dst)

# flags=cv2.WARP_INVERSE_MAP の場合、M の逆行列が適用される。
dst = cv2.warpAffine(img, M, dsize=(w, h), flags=cv2.WARP_INVERSE_MAP)
imshow(dst)

borderMode – 外挿方法
変換後に値がないピクセルを外挿する方法を BorderTypes から指定できます。
デフォルトでは、borderMode=cv2.BORDER_CONSTANT、borderValue=0 となっており、黒で塗りつぶされるようになっています。
img = cv2.imread("sample.jpg")

h, w, c = img.shape
center = w / 2, h / 2
M = cv2.getRotationMatrix2D(center=center, angle=30, scale=1)

# 画像にアフィン変換行列を適用する。
rotated = cv2.warpAffine(img, M, dsize=(w, h), borderValue=(0, 255, 0))
imshow(rotated)
外挿方法で cv2.BORDER_TRANSPARENT を指定すると、dst 引数に指定した画像の画素値が外挿に使用されます。これを利用することである画像を別の画像に埋め込むことができます。

# 前景画像、背景画像を読み込む。
fg_img = cv2.imread("sample.jpg")  # アフィン変換を適用する画像
bg_img = cv2.imread("background.jpg")  # 背景画像

# 画像の中心回りに120度回転し、0.5倍に縮小するアフィン変換行列を作成する。
fg_h, fg_w = fg_img.shape[:2]
M = cv2.getRotationMatrix2D(center=(fg_w / 2, fg_h / 2), angle=120, scale=0.5)

# 画像にアフィン変換行列を適用する。
bg_h, bg_w = bg_img.shape[:2]
dst = cv2.warpAffine(
    fg_img, M, dsize=(bg_w, bg_h), dst=bg_img, borderMode=cv2.BORDER_TRANSPARENT
)
imshow(dst)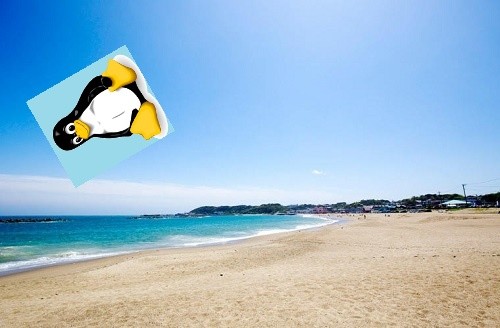
アフィン変換の種類
拡大縮小
$x$ 軸方向に $s_x$、$y$ 軸方向に $s_y$ だけ拡大縮小 (scaling) します。
def scale(sx, sy):
    M = np.array([[sx, 0, 0],
                  [0, sy, 0]], dtype=float)

    return M


M = scale(2, 2)
dst = cv2.warpAffine(img, M, dsize=(w * 2, h * 2))
imshow(dst)cv2.getRotationMatrix2D – 回転
回転を表すアフィン変換行列を作成する関数 cv2.getRotationMatrix2D() が用意されています。
retval = cv2.getRotationMatrix2D(center, angle, scale)| 名前 | 型 | デフォルト値 |
|---|---|---|
| center | tuple of 2-floats | |
| 回転する中心 | ||
| angle | float | |
| 回転角度 (degree) | ||
| scale | float | |
| 拡大縮小率 | ||
| 名前 | 説明 | ||
|---|---|---|---|
| retval | アフィン変換行列 | ||
# 画像の中心回りに30度回転するアフィン変換行列を作成する。
M = cv2.getRotationMatrix2D(center=(w / 2, h / 2), angle=30, scale=1)

# 画像にアフィン変換行列を適用する。
dst = cv2.warpAffine(img, M, dsize=(w, h))
imshow(dst)
この関数は、回転の中心を $center = (c_x, c_y)^T$、回転角度を $\theta$、スケールを $s$ としたとき、次の4つの変換をまとめたアフィン変換行列が作成されます。
- 回転の中心が原点となるように、$(-c_x, -c_y)$ だけ平行移動する $$ A_1 = \begin{pmatrix} 1 & 0 & -c_x \\ 0 & 1 & -c_y \\ 0 & 0 & 1 \\ \end{pmatrix} $$
- 原点を中心に反時計回りに $\theta$ だけ回転する $$ A_2 = \begin{pmatrix} \cos \theta & \sin \theta & 0 \\ -\sin \theta & \cos \theta & 0 \\ 0 & 0 & 1 \\ \end{pmatrix} $$
- $s$ 倍だけスケールする $$ A_3 = \begin{pmatrix} s & 1 & 0 \\ 1 & s & 0 \\ 0 & 0 & 1 \\ \end{pmatrix} $$
- 1で平行移動した分を戻すため、$(c_x, c_y)$ だけ平行移動する $$ A_4 = \begin{pmatrix} 1 & 0 & c_x \\ 0 & 1 & c_y \\ 0 & 0 & 1 \\ \end{pmatrix} $$
以上4つのアフィン変換を1つにまとめると、
$$ \begin{aligned} A_4 A_3 A_2 A_1 &= \begin{pmatrix} 1 & 0 & c_x \\ 0 & 1 & c_y \\ 0 & 0 & 1 \end{pmatrix} \begin{pmatrix} s & 1 & 0 \\ 1 & s & 0 \\ 0 & 0 & 1 \end{pmatrix} \begin{pmatrix} \cos \theta & \sin \theta & 0 \\ -\sin \theta & \cos \theta & 0 \\ 0 & 0 & 1 \\ \end{pmatrix} \begin{pmatrix} 1 & 0 & -c_x \\ 0 & 1 & -c_y \\ 0 & 0 & 1 \end{pmatrix} \\ &= \begin{pmatrix} s \cos \theta & s \sin \theta & -s c_x \cos \theta -s c_y \sin \theta + c_x \\ – s \sin \theta & s \cos \theta & s c_x \sin \theta -s c_y \cos \theta + c_y \\ 0 & 0 & 1 \end{pmatrix} \end{aligned} $$ここで、$\alpha = s \cos \theta, \beta = s \sin \theta$ とおくと、
$$ \begin{pmatrix} \alpha & \beta & (1 – \alpha) c_x – \beta c_y \\ -\beta & \alpha & \beta c_x + (1 – \alpha) c_y \\ 0 & 0 & 1 \\ \end{pmatrix} $$cx, cy = (100, 100)
angle = 120
scale = 3
M = cv2.getRotationMatrix2D((cx, cy), angle, scale)
print(M)
# 上の式と一致することを確認する。
a = scale * np.cos(np.deg2rad(angle))
b = scale * np.sin(np.deg2rad(angle))
M2 = np.array([[a, b, (1 - a) * cx - b * cy], [-b, a, b * cx + (1 - a) * cy]])
print(M2)
assert np.allclose(M, M2)[[ -1.5 2.59807621 -9.80762114] [ -2.59807621 -1.5 509.80762114]] [[ -1.5 2.59807621 -9.80762114] [ -2.59807621 -1.5 509.80762114]]
cv2.rotate – 画像を90°単位で回転
90°単位で回転させる場合は、cv2.warpAffine() ではなく、cv2.rotate() を使います。
dst = cv2.rotate(src, rotateCode[, dst])| 名前 | 型 | デフォルト値 |
|---|---|---|
| rotateCode | int | |
|
||
| 名前 | 説明 | ||
|---|---|---|---|
| dst | 出力画像 | ||
# 反時計回りに90° (時計回りに270°) 回転させる。
dst = cv2.rotate(img, cv2.ROTATE_90_COUNTERCLOCKWISE)
imshow(dst)
# 反時計回りに180° (時計回りに180°) 回転させる。
dst = cv2.rotate(img, cv2.ROTATE_180)
imshow(dst)
# 反時計回りに270° (時計回りに90°) 回転する。
dst = cv2.rotate(img, cv2.ROTATE_90_CLOCKWISE)
imshow(dst)
平行移動
$x$ 軸方向に $t_x$、$y$ 軸方向に $t_y$ だけ平行移動 (translation) します。
def translation(tx, ty):
    M = np.array([[1, 0, tx],
                  [0, 1, ty]], dtype=float)

    return M


M = translation(20, 30)
dst = cv2.warpAffine(img, M, dsize=(w, h))
imshow(dst)
cv2.flip – 反転
画像を上下左右に反転させる場合は cv2.flip() を使います。
dst = cv2.flip(src, flipCode[, dst])| 名前 | 型 | デフォルト値 |
|---|---|---|
| flipCode | int | |
|
||
| 名前 | 説明 | ||
|---|---|---|---|
| dst | 出力画像 | ||
# 上下反転する。
dst = cv2.flip(img, 0)
imshow(dst)
# 左右反転する。
dst = cv2.flip(img, 1)
imshow(dst)
せん断
水平せん断 (sheer) します。
def sheer_x(l):
    M = np.array([[1, -l, 0],
                  [0, 1, 0]], dtype=float)

    return M


M = sheer_x(0.3)
dst = cv2.warpAffine(img, M, dsize=(w, h))
imshow(dst)
鉛直せん断 (sheer) します。
def sheer_y(l):
    M = np.array([[1, 0, 0],
                  [-l, 1, 0]], dtype=float)

    return M


M = sheer_y(0.3)
dst = cv2.warpAffine(img, M, dsize=(w, h))
imshow(dst)
-
前の記事

OpenCV – 画像に適用するアフィン変換について 2020.06.14
-
次の記事

OpenCV – 微分フィルタ、Prewitt フィルタ、Sobel フィルタについて 2020.06.14