概要
画像処理の 2 値化の仕組みと OpenCV の cv2.threshold() の使い方を解説します。
2 値化
画像をある閾値を基準にして、2 つの階調で表現される2 値画像 (binary image) に変換する処理のことを2 値化 (Thresholding) といいます。
以下の例を見てみましょう。 左側のグレースケール画像の各画素は 0 から 255 の 256 階調の値で表現されています。 これを値が 10 より大きいなら 1、10 以下なら 0 と変換します。 すると、各画素が $0, 255$ の 2 階調で表される 2 値画像が得られます。
$$ \mathrm{dst}(x, y) = \begin{cases} 0 & \mathrm{src}(x, y) \le 10 \\ 1 & \mathrm{src}(x, y) > 10 \end{cases} $$ただし、$\mathrm{src}(x, y)$ は入力画像の位置 $(x, y)$ の画素値、$\mathrm{dst}(x, y)$ は出力画像の位置 $(x, y)$ の画素値を表します。
OpenCV で 2 値化を行う方法
2 値化は全画素を同じ閾値で変換する大域的 2 値化 (global thresholding) と領域ごとに異なる閾値で変換する適応的 2 値化 (adaptive thresholding) の 2 つの方法があります。 明るさが画像全体で均一でない場合、大域的 2 値化では上手く 2 値化ができないかもしれません。その場合は、適応的 2 値化を検討してください。
OpenCV では、2 値化は以下の関数で行えます。
- 大域的 2 値化
- threshold(): ある閾値以下かどうかで 2 値化します。
- inRange(): 2 つの閾値の範囲内かどうかで 2 値化します。
- 適応的 2 値化
- adaptiveThreshold(): 領域ごとに適応的に閾値を決めて、2 値化します。
このうち、cv2.threshold() を使った 2 値化のやり方を以下で紹介します。
cv2.threshold()
cv2.threshold() では、ある 1 つの閾値を決めて、2 値化を行います。
ret, dst = cv2.threshold(src, dst, threshold, maxValue, thresholdType)| 名前 | 型 | デフォルト値 |
|---|---|---|
| src | ndarray | |
| 入力画像 (uint8 または float 型の numpy 配列) | ||
| threshold | int | |
| 閾値 | ||
| maxValue | int | |
| cv2.THRESH_BINARY, cv2.THRESH_BINARY_INV の場合に、前景の値。 | ||
| thresholdType | int | |
| 2 値化の方法 | ||
| 名前 | 説明 | ||
|---|---|---|---|
| retval | 閾値 (cv2.THRESH_OTSU、cv2.THRESH_TRIANGLE を使用した場合に自動的に決まった閾値を知るための返り値) | ||
| dst | 2 値画像 | ||
基本的な使い方
import cv2
import numpy as np
from IPython.display import display, Image


def imshow(img):
    """ndarray 配列をインラインで Notebook 上に表示する。"""
    ret, encoded = cv2.imencode(".jpg", img)
display(Image(encoded))カラー画像なので、cv2.cvtColor(img, cv2.COLOR_BGR2GRAY) でグレースケール画像に変換します。
今回は、次のように 2 値化します。
$$ \mathrm{dst}(x, y) = \begin{cases} 0 & \mathrm{src}(x, y) \le 10 \\ 255 & \mathrm{src}(x, y) > 10 \end{cases} $$そのため、閾値 threshold を 10、閾値より大きい場合に変換する値 maxValue を 255、2 値化の方法 thresholdType を cv2.THRESH_BINARY に設定しました。
# 画像を読み込む。
img = cv2.imread("sample.jpg")

# グレースケール形式に変換する。
gray = cv2.cvtColor(img, cv2.COLOR_BGR2GRAY)

# 2値化する。
ret, binary = cv2.threshold(gray, 10, 255, cv2.THRESH_BINARY)
imshow(binary)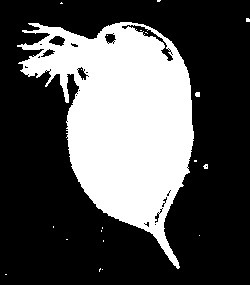
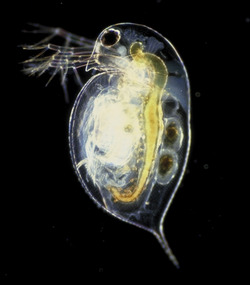
2 値化の目的は、画像の画素を関心がある領域とそうでない領域に分けることにあります。 輪郭抽出を行なう findContours() などの関数は、背景が 0、抽出対象の物体が 0 以外の値をとる 2 値画像を要求するため、2 値化する際は関心がある領域 (今回の場合、ミジンコ) の画素が 255 となるように閾値を選びます。
thresholdType
thresholdType は 2 値化の方法を指定します。
| thresholdType | 概要 |
|---|---|
| cv2.THRESH_BINARY | threshold 以下の値を 0、それ以外の値を maxValue にして 2 値化を行います。 |
| cv2.THRESH_BINARY_INV | threshold 以下の値を maxValue、それ以外の値を 0 にして 2 値化を行います。 |
| cv2.THRESH_TRUNC | threshold 以下の値はそのままで、それ以外の値を threshold にします。 |
| cv2.THRESH_TOZERO | threshold 以下の値を 0、それ以外の値はそのままにします。 |
| cv2.THRESH_TOZERO_INV | threshold 以下の値はそのままで、それ以外の値を 0 にします。 |
| cv2.THRESH_OTSU | 大津の手法で閾値を自動的に決める場合に指定します。 |
| cv2.THRESH_TRIANGLE | ライアングルアルゴリズムで閾値を自動的に決める場合に指定します。 |
- cv2.THRESH_BINARY
- cv2.THRESH_BINARY_INV
- cv2.THRESH_TRUNC
- cv2.THRESH_TOZERO
- cv2.THRESH_TOZERO_INV
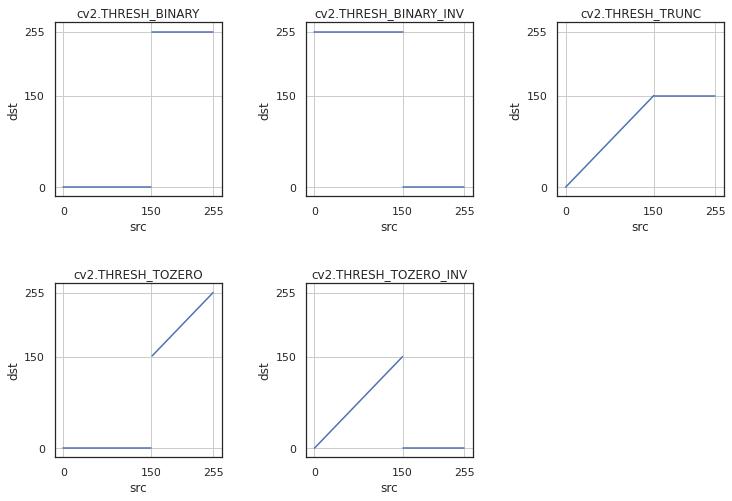
横軸が入力の値、縦軸が変換後の値を表します。
cv2.THRESH_OTSU、cv2.THRESH_TRIANGLE を指定すると、閾値を画像から自動的に決めます。
この 2 つのフラグは cv2.THRESH_BINARY + cv2.THRESHOLD_OTSU のように上記 5 つのいずれかのフラグと組み合わせて指定します。
自動的に決めた閾値は返り値 ret として返します。
# 大津の手法
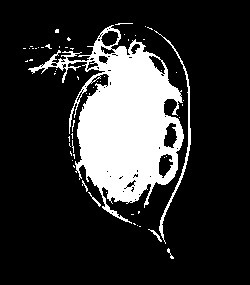
ret, binary = cv2.threshold(gray, 10, 255, cv2.THRESH_BINARY + cv2.THRESH_OTSU)
print(f"threshold: {ret}")  # threshold: 88.0
imshow(binary)
threshold: 88.0
# トライアングルアルゴリズム
ret, binary = cv2.threshold(gray, 10, 255, cv2.THRESH_BINARY + cv2.THRESH_TRIANGLE)
print(f"threshold: {ret}")  # threshold: 3.0
imshow(binary)
threshold: 4.0
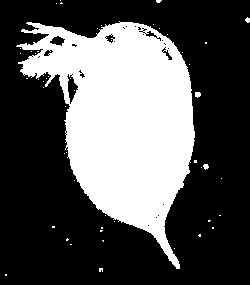
綺麗に 2 値化できていますね。
閾値の決め方について
cv2.THRESH_OTSU または cv2.THRESH_TRIANGLE で自動で決めた閾値でうまく 2 値化ができるればそれでよいですが、いつも上手くいくとは限りません。 その場合は手動で閾値を決める必要があります。 2 値化の結果を確認しながら、関心がある領域が 0 以外の値になるように閾値を調整しましょう。
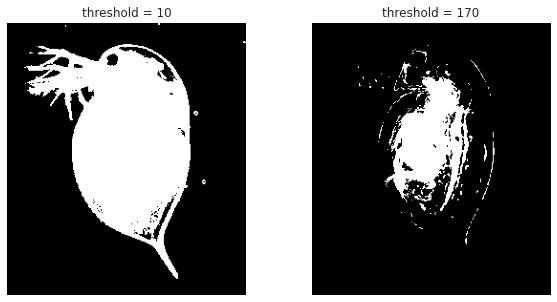
threshold=10 の結果 (左) 及び threshold=170 の結果 (右) です。
左のようになるのが理想であり、右は 2 値化が綺麗にできていません。
ipywidgets を使用したパラメータ調整
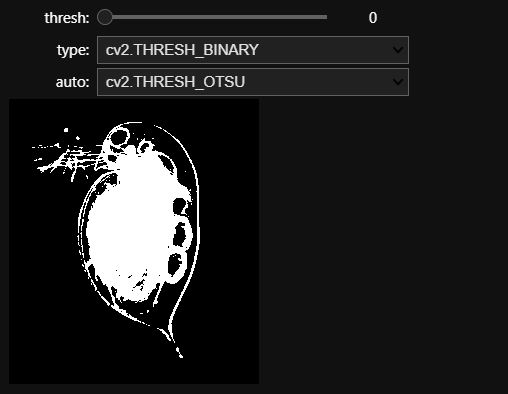
Jupyter Notebook で利用できる ipywidgets を使ってパラメータを調整するためのコードを記載します。
import cv2
import numpy as np
from IPython.display import Image, display
from ipywidgets import widgets
from matplotlib import pyplot as plt


def imshow(img):
    """画像を Notebook 上に表示する。"""
    encoded = cv2.imencode(".png", img)[1]
    display(Image(encoded))


def process(thresh, type_, auto):
    """2値化処理を行い、結果を表示する。"""
    type_ = eval(type_)
    auto = eval(auto)
    if auto:
        type_ += auto
    ret, binary = cv2.threshold(img, thresh, maxval=255, type=type_)
    imshow(binary)


param_widgets = {}

# パラメータ thresh を設定するスライダー
param_widgets["thresh"] = widgets.IntSlider(
    min=0, max=255, step=1, value=0, description="thresh: "
)

# パラメータ type を設定するプルダウンメニュー
options = [
    "cv2.THRESH_BINARY",
    "cv2.THRESH_BINARY_INV",
    "cv2.THRESH_TRUNC",
    "cv2.THRESH_TOZERO",
    "cv2.THRESH_TOZERO_INV",
]
param_widgets["type_"] = widgets.Dropdown(options=options, description="type: ")

# 閾値自動化の方法を使用するかどうか
options = [
    "None",
    "cv2.THRESH_OTSU",
    "cv2.THRESH_TRIANGLE",
]
param_widgets["auto"] = widgets.Dropdown(options=options, description="auto: ")

for x in param_widgets.values():
    x.layout.width = "400px"

# 画像を読み込む。
img = cv2.imread("sample.jpg", cv2.IMREAD_GRAYSCALE)

# ウィジェットを表示する。
widgets.interactive(process, **param_widgets)

コメント