
概要
公式の Python インタプリタとエディタ Visual Studio Code を使用し、Windows 上に Python の開発環境を作成する方法について紹介します。
Python をインストールする
インストーラーをダウンロードする
Python Release Python 3.8.3 からインストーラーをダウンロードします。 64bit 版 Windows の場合は「Windows x86-64 executable installer」、32bit 版 Windows の場合は「Windows x86 executable installer」を選択します。
インストーラーを実行する
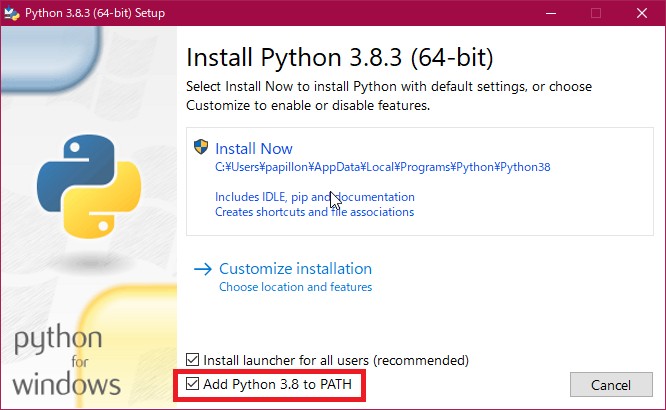
「Add Python 3.8 to PATH」にチェックを入れて、「Install Now」をクリックします。
コマンドプロンプトを起動し、python --version でバージョンが表示されたら、Python が使える状態になっています。
> python --version
Python 3.8.3
Visual Studio Code のインストール
エディタとして Visual Studio Code (以下、VS Code) を使用します。
インストーラーをダウンロードする
VS Code のサイト からインストーラーをダウンロードします。 64bit 版 Windows の場合は「64 bit」、32bit 版 Windows の場合は「32 bit」を選択します。そのユーザーのみが使用する場合は User Installer、そのパソコンのすべてのユーザーが使用する場合は System Installer を選択します。
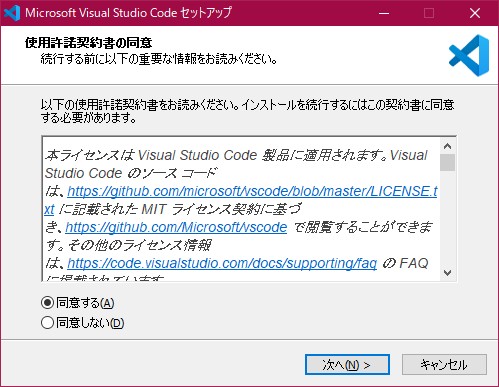
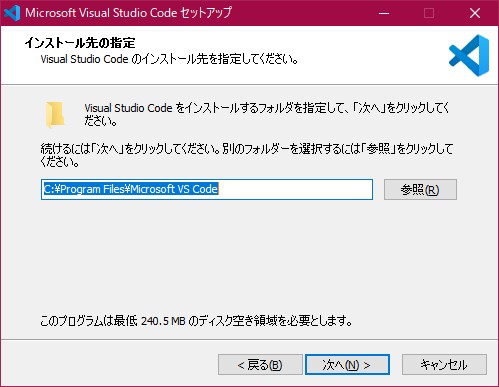
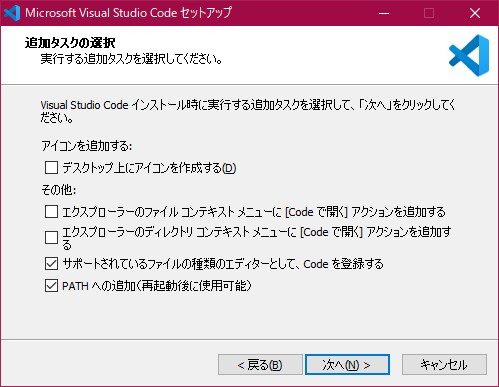
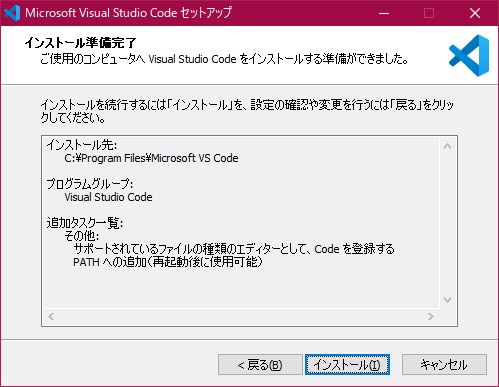
インストーラーを実行する
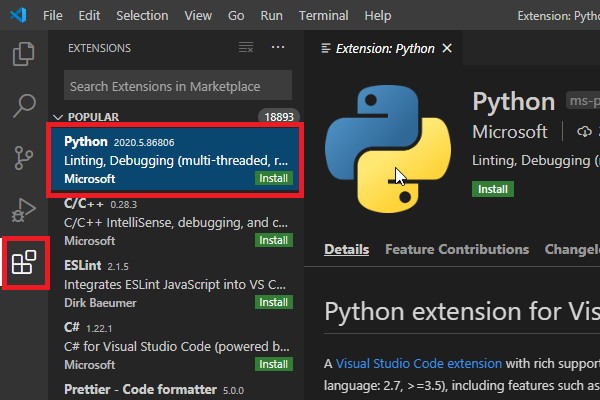
拡張「Python」をインストールする
VS Code を起動し、「Ctrl + Shift + X」を押して、「EXTENSIONS」タブを開きます。 検索バーに「Python」と入力すると、拡張「Python」が表示されるので、インストールします。
VS Code で開発する
上記で Python を開発するための必要最低限の環境が整ったので、VS Code でコードを作成し、実行してみます。
ワーキングスペースを設定する
sample という名前の作業ディレクトリを作成します。
メニューの「File」→「Open Workspace…」から作成したディレクトリをワークスペース (wrok space)として設定します。ワークスペースとは、作業を行うルートディレクトリのことを指します。
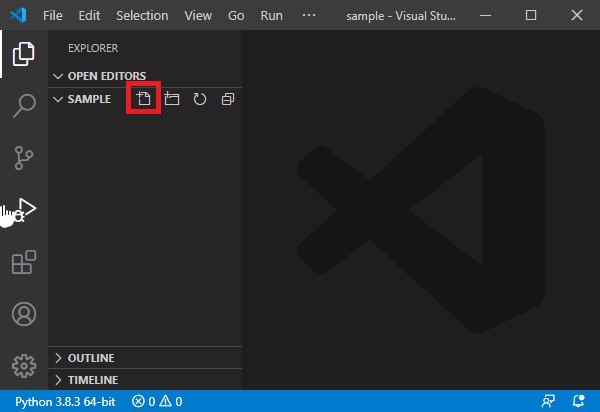
.py ファイルを作成する
「New File」ボタンをクリックし、「sample.py」と入力します。
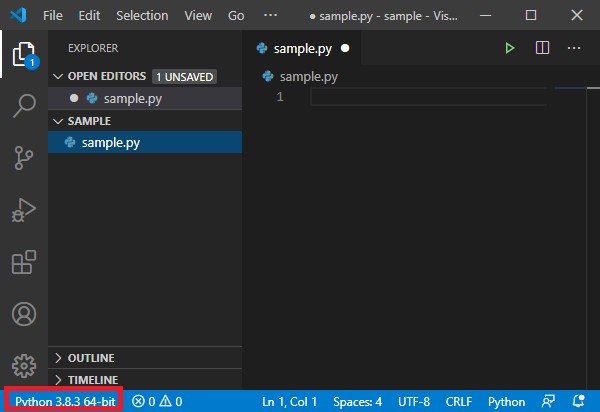
すると、「sample.py」がワークスペースに作成され、エディタで開かれます。VS Code は編集する言語の種類をファイルの拡張子で判断します。 左下の欄に自動で認識された Python インタプリタの名前が表示されていることを確認してください。
コードを入力する
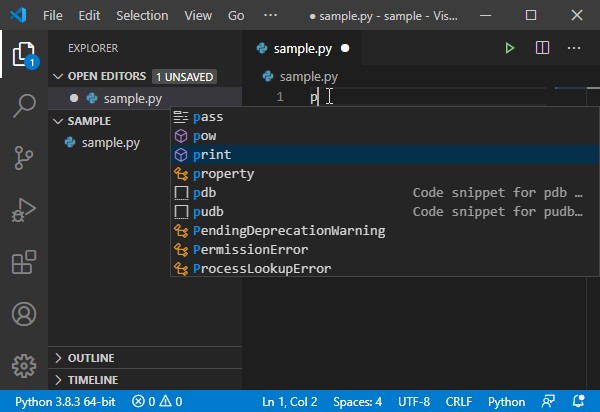
Hello World を出力するコードを記述します。
print("Hello World")入力中に自動補完 (Auto Complete) が起動し、入力候補が表示されます。 「Tab」または「Enter」を押すと、現在選択されている入力候補を使用して補間されます。
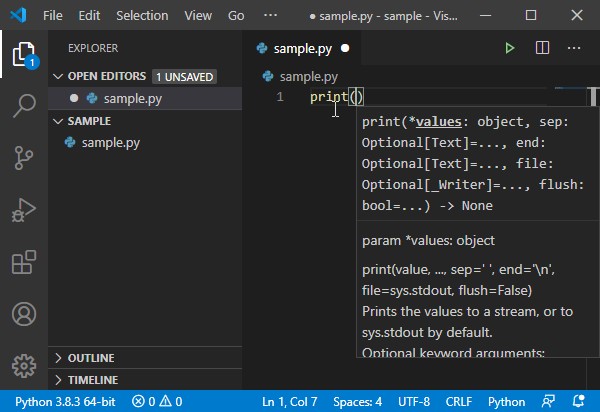
また、print( まで打つと、関数の説明が表示されるようになっています。
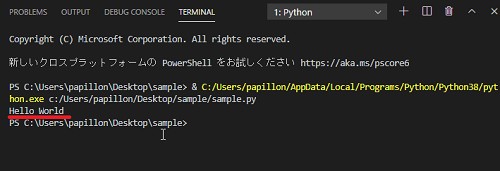
コードを入力したら、「▶」ボタンを押して、実行します。
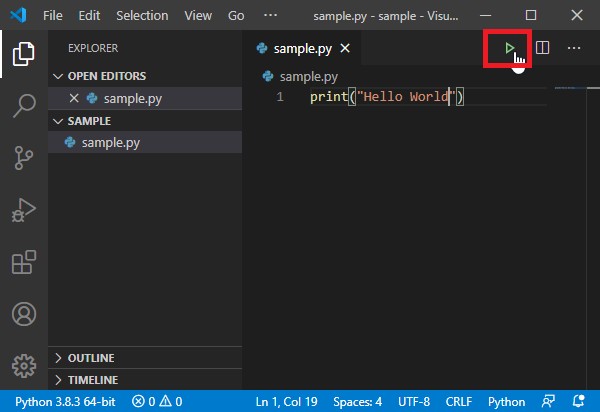
すると、実行結果が出力されます。
コメント