
目次
概要
OpenCV の画像をリサイズする関数 cv2.resize() の使い方について解説します。
cv2.resize
dst = cv2.resize(src, dsize[, dst[, fx[, fy[, interpolation]]]])
引数
| 名前 | 型 | デフォルト値 |
|---|---|---|
| src | ndarray, None | |
| 入力画像 | ||
| dsize | tuple of 2-ints | |
| リサイズ後の大きさを (w, h) で指定 | ||
| fx | float | 0 |
| $x$ 方向の倍率 | ||
| fy | float | 0 |
| $y$ 方向の倍率 | ||
| interpolation | ndarray | cv2.INTER_LINEAR |
補完方法
|
||
返り値
| 名前 | 説明 | ||
|---|---|---|---|
| dst | リサイズ後の画像 | ||
リサイズは dsize で大きさを指定する方法と fx、fy で倍率で指定する方法の 2 種類があります
- dsize: リサイズ後の大きさを指定する。
- fx、fy: $x, y$ 方向の倍率をそれぞれ指定する。このとき、
dsize=Noneにする。
サンプルコード

In [1]:
import cv2
from IPython.display import Image, display


def imshow(img):
    """ndarray 配列をインラインで Notebook 上に表示する。"""
    ret, encoded = cv2.imencode(".jpg", img)
    display(Image(encoded))
画像を指定した大きさにリサイズする
In [2]:
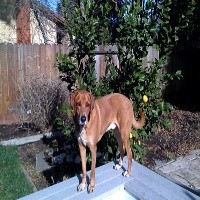
img = cv2.imread("sample.jpg")

# 指定した大きさにリサイズする。
dst = cv2.resize(img, dsize=(200, 200))

print(f"{img.shape} -> {dst.shape}")
imshow(dst)
(350, 500, 3) -> (200, 200, 3)
画像を指定した倍率にリサイズする
In [3]:
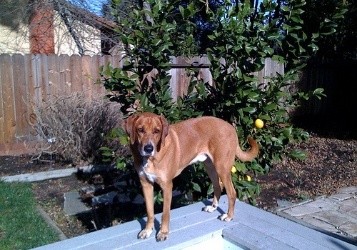
img = cv2.imread("sample.jpg")

# 指定した倍率にリサイズする。
dst = cv2.resize(img, dsize=None, fx=0.5, fy=0.5)

print(f"{img.shape} -> {dst.shape}")
imshow(dst)
(350, 500, 3) -> (175, 250, 3)

画像を幅が指定した値になるようにリサイズする
In [4]:
def scale_to_width(img, width):
    """幅が指定した値になるように、アスペクト比を固定して、リサイズする。"""
    h, w = img.shape[:2]
    height = round(h * (width / w))
    dst = cv2.resize(img, dsize=(width, height))

    return dst


img = cv2.imread("sample.jpg")

# 幅が指定した値になるようにリサイズする。
dst = scale_to_width(img, 250)
print(f"{img.shape} -> {dst.shape}")
imshow(dst)
(350, 500, 3) -> (175, 250, 3)
画像を高さが指定した値になるようにリサイズする
In [5]:
def scale_to_height(img, height):
    """高さが指定した値になるように、アスペクト比を固定して、リサイズする。"""
    h, w = img.shape[:2]
    width = round(w * (height / h))
    dst = cv2.resize(img, dsize=(width, height))

    return dst


img = cv2.imread("sample.jpg")

# 高さが指定した値になるようにリサイズする。
dst = scale_to_height(img, 250)
print(f"{img.shape} -> {dst.shape}")
imshow(dst)
(350, 500, 3) -> (250, 357, 3)
画像を指定した大きさに収まるようにリサイズする

入力画像の大きさを $(w, h)$、指定した大きさを $(bw, bh)$ とします。 リサイズ後の大きさ $(nw, nh)$ を次の関係を満たすように決めます。
- アスペクト比が固定なので、$\text{aspect} = \frac{w}{h} = \frac{nw}{nh}$
- $\frac{bw}{w} \ge \frac{bh}{h} \Leftrightarrow \frac{bw}{bh} \ge \text{aspect}$ のとき、$nh = bh$ なので、$nw = nh \times \text{aspect}$
- $\frac{bw}{w} < \frac{bh}{h} \Leftrightarrow \frac{bw}{bh} < \text{aspect}$ のとき、$nw = bw$ なので、$nh = \frac{nw}{\text{aspect}}$
In [6]:
def scale_box(img, width, height):
    """指定した大きさに収まるように、アスペクト比を固定して、リサイズする。"""
    h, w = img.shape[:2]
    aspect = w / h
    if width / height >= aspect:
        nh = height
        nw = round(nh * aspect)
    else:
        nw = width
        nh = round(nw / aspect)

    dst = cv2.resize(img, dsize=(nw, nh))

    return dst


# 指定した大きさに収まるようにリサイズする。
dst = scale_box(img, 300, 300)
print(f"{img.shape} -> {dst.shape}")
imshow(dst)
(350, 500, 3) -> (210, 300, 3)

画像を指定した解像度にリサイズする
入力画像の大きさを $(w, h)$、リサイズ後の解像度を $\text{resolution}$ とします。 リサイズの倍率 $s$ を次の方程式を満たすように決めます。
$$ (w \times s) \times (h \times s) = \text{resolution} $$これを解くと、
$$ s = \sqrt{\frac{\text{resolution}}{w \times h}} $$
In [7]:
def scale_to_resolation(img, resolation):
    """指定した解像度になるように、アスペクト比を固定して、リサイズする。"""
    h, w = img.shape[:2]
    scale = (resolation / (w * h)) ** 0.5
    return cv2.resize(img, dsize=None, fx=scale, fy=scale)


img = cv2.imread("sample.jpg")

# 指定した解像度になるようにリサイズする。
dst = scale_to_resolation(img, 640 * 480)

print(f"{img.shape} -> {dst.shape}")
imshow(dst)
(350, 500, 3) -> (464, 662, 3)

画像のリサイズの際の補間方法について
cv2.resize では、interpolation 引数にて、画像をリサイズした際の画素値の補間方法を指定できます。デフォルトはバイリニア補間となっています。補間方法による違いを計算速度及び画質の観点で評価しました。
画質の評価は、入力画像を縮小した後、再び元の大きさに拡大して、入力画像とどのくらい値が異なるかを PSNR という指標で評価しました。OpenCV では、PSNR は cv2.PSNR() で計算できます。
5000 枚の画像に対して、計算時間及び PSNR を評価した結果、平均は以下のようになりました。
- 計算時間 (ms): 画像を 30%縮小するのに要した時間
- PSNR: 「入力画像を 50%にリサイズ後、元のサイズに再度リサイズした画像」と入力画像を比較した PSNR の値
| 計算時間 (ms) | PSNR | |
|---|---|---|
| interpolation | ||
| cv2.INTER_NEAREST | 0.04 | 23.45 |
| cv2.INTER_LINEAR | 0.08 | 26.66 |
| cv2.INTER_CUBIC | 0.51 | 27.12 |
| cv2.INTER_AREA | 1.45 | 26.42 |
| cv2.INTER_LANCZOS4 | 1.12 | 26.35 |
計算速度では、cv2.INTER_AREA と cv2.INTER_LANCZOS4 は他の手法より時間がかかる結果となりました。
PSNR では、cv2.INTER_NEAREST 以外はほぼ同じ値となりました。
よって、拘りがなければ、デフォルトの cv2.INTER_LINEAR で問題がなさそうです。
コメント