概要
この記事では、OpenCV を使用してカラー画像に階調変換を適用する方法を紹介します。
関連記事
グレースケール画像に階調変換を適用する方法については以下の記事を参照してください。
すべてのチャンネルに同じ階調変換を適用する
以下の記事で解説した階調変換を各チャンネルに適用した例を紹介します。
OpenCV – ガンマ補正、ネガポジ反転、ポスタリゼーションを行う方法 | pystyle
ネガポジ反転
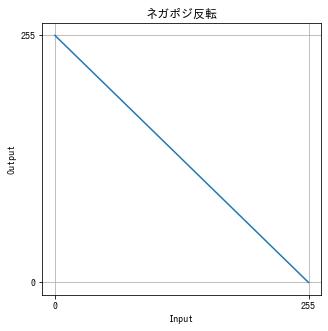
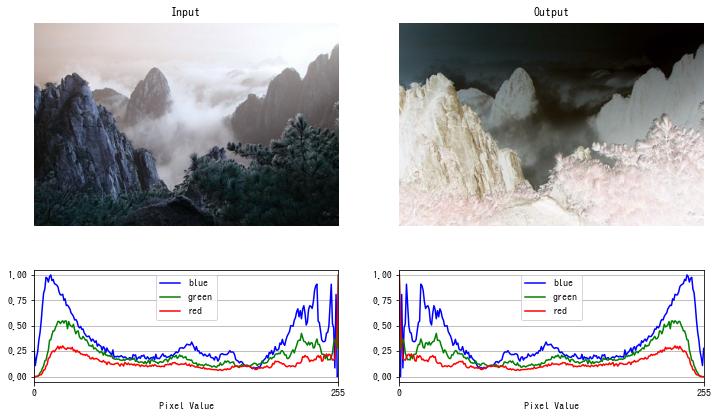
画素値を反転させる階調変換をネガポジ反転といいます。
$f(x) = 255 – x$
import cv2
from IPython.display import Image, display


def imshow(img):
    """ndarray 配列をインラインで Notebook 上に表示する。"""
    ret, encoded = cv2.imencode(".jpg", img)
display(Image(encoded))def invert(img):
# ネガポジ反転
y = 255 - np.arange(256)
dst = cv2.LUT(img, y).astype(np.uint8)
return dst
img = cv2.imread("sample.jpg")
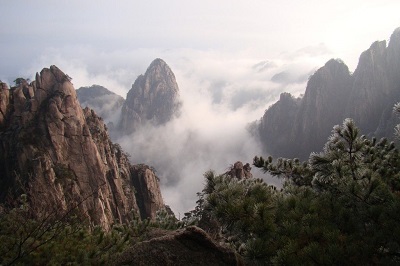
dst = invert(img)
imshow(dst)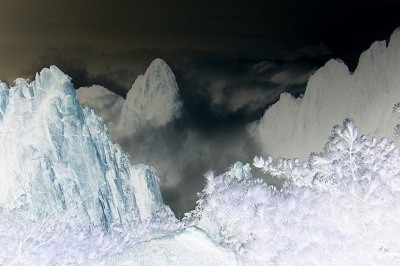
ソラリゼーション
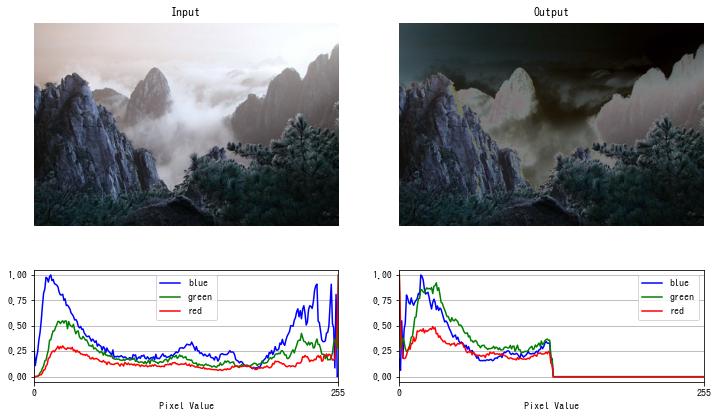
過度の露光で画像の一部が反転する現象を ソラリゼーション (solarization) といいます。 以下の関数でソラリゼーションを擬似的に再現できます。
$$ f(x) = \begin{cases} x & x \le \mathrm{threshold} \\ 255 – x & その他の場合 \end{cases} $$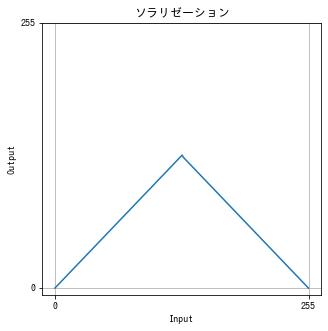
def solarize(img, threshold):
    # ソラリゼーション
    x = np.arange(256)
    y = np.where(x <= threshold, x, 255 - x)

    dst = cv2.LUT(img, y).astype(np.uint8)

    return dst


img = cv2.imread("sample.jpg")

dst = solarize(img, threshold=128)
imshow(dst)
コントラストを上げる (1)
$$ f(x) = \begin{cases} \frac{255}{t} & x \le t \\ 255 & x > t \end{cases} = \text{clip}\left(\frac{255}{t}, 0, 255\right) $$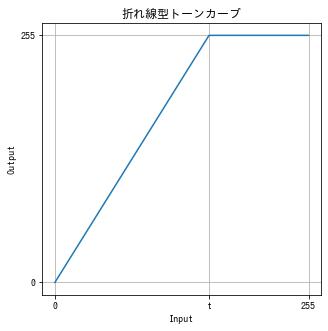
def increase_contrast(img, t):
    x = np.arange(256)
    y = np.clip(255 / t * x, 0, 255)

    dst = cv2.LUT(img, y).astype(np.uint8)

    return dst


img = cv2.imread("sample.jpg")
dst = increase_contrast(img, t=155)
imshow(dst)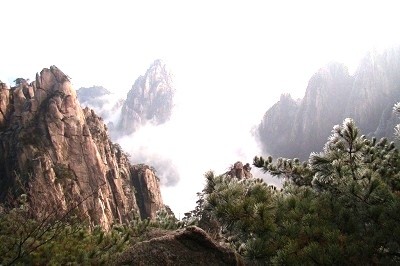

コントラストを上げる (2)
$$ f(x) = \frac{255 – t}{255} x + t $$def increase_contrast(img, t):
x = np.arange(256)
y = (255 - t) / 255 * x + t
dst = cv2.LUT(img, y)
return dst
img = cv2.imread("sample.jpg")
dst = increase_contrast(img, t=55)
imshow(dst)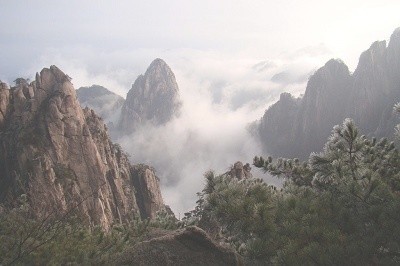

コントラストを下げる (1)
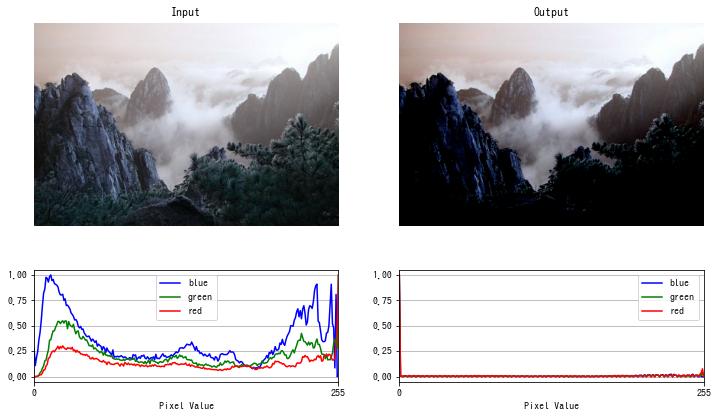
$$ f(x) = \begin{cases} 0 & x \le t \\ \frac{255 + b}{255}x – b & x > t \end{cases} = \text{clip}\left(\frac{255 + b}{255}x – b, 0, 255\right) $$ただし、$b$ は次を解いて得られる値です。
$$ \frac{255 + b}{255}t – b = 0 $$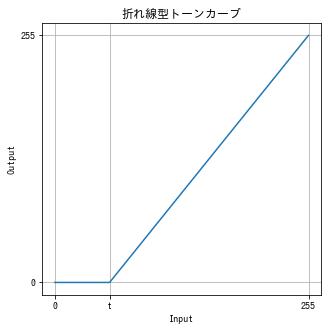
def decrease_contrast(img, t):
    x = np.arange(256)
    y = np.clip(255 / (255 - t) * x - 255 / (255 - t) * t, 0, 255)

    dst = cv2.LUT(img, y).astype(np.uint8)

    return dst


img = cv2.imread("sample.jpg")

dst = decrease_contrast(img, t=70)
imshow(dst)
コントラストを下げる (2)
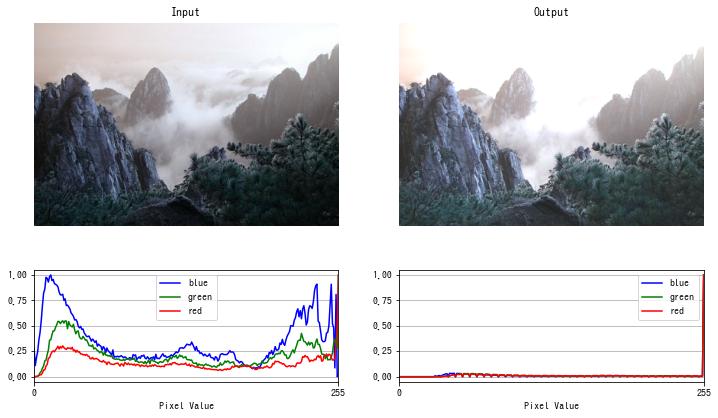
$$ f(x) = \frac{t}{255} $$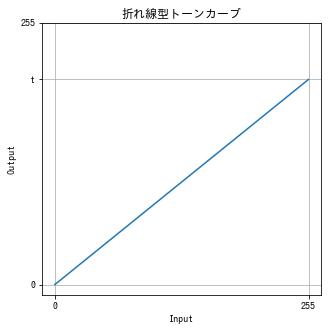
def decrease_contrast(img, t):
    x = np.arange(256)
    y = t / 255 * x

    dst = cv2.LUT(img, y).astype(np.uint8)

    return dst


img = cv2.imread("sample.jpg")

dst = decrease_contrast(img, t=200)
imshow(dst)

明るさ、コントラストの補正
$$ f(x) = \text{clip}(\alpha x + \beta , 0, 255) $$$\alpha$ はゲイン (gain) またはコントラスト (contrast)、$\beta$ はバイアス (bias) または明るさ (brightness) といいます。
def adjust(img, alpha, beta):
    x = np.arange(256)
    y = np.clip(alpha * x + beta, 0, 255)

    dst = cv2.LUT(img, y)

    return dst


img = cv2.imread("sample.jpg")

dst = adjust(img, alpha=1.2, beta=30)
imshow(dst)
ガンマ補正
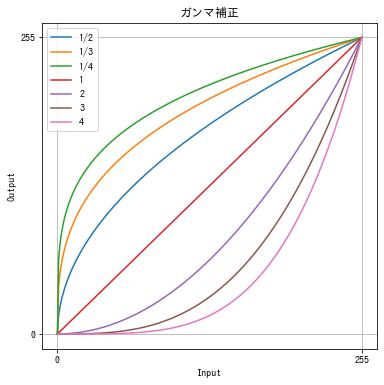
次の関数で行う階調変換をガンマ変換 (gamma transformation) またはガンマ補正 (gamma correction) といいます。
$$ f(x) = \left(\frac{x}{255}\right)^\gamma \times 255 $$$\gamma < 1$ で暗く、$\gamma > 1$ で明るくなるように補正できます。
def gamma_correction(img, gamma):
    x = np.arange(256)
    y = (x / 255) ** gamma * 255

    dst = cv2.LUT(img, y).astype(np.uint8)

    return dst


img = cv2.imread("sample.jpg")
dst = gamma_correction(img, gamma=0.3)
imshow(dst)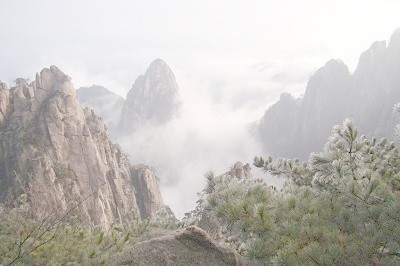
img = cv2.imread("sample.jpg")
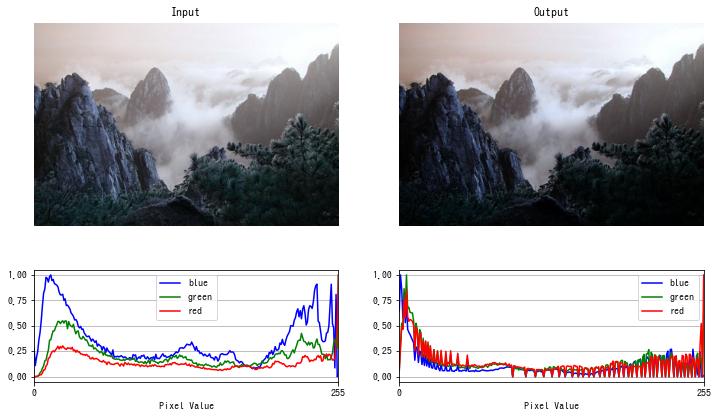
dst = gamma_correction(img, gamma=3)
imshow(dst)
S 字型トーンカーブ
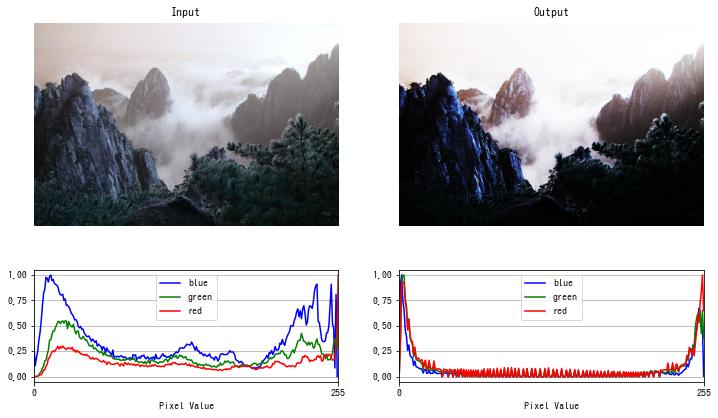
S 字型のトーンカーブで階調変換すると、暗い部分は更に暗く、明るい部分は更に明るくすることができます。
以下の例では、$\arctan(x), x \in [-5, 5]$ の値を $[0, 255]$ にスケールすることで S 字型のトーンカーブを作成しました。
def s_curve(img):
    y = np.arctan(np.linspace(-5, 5, 256))
    y = 255 / (y.max() - y.min()) * (y - y.max()) + 255

    dst = cv2.LUT(img, y).astype(np.uint8)

    return dst


img = cv2.imread("sample.jpg", cv2.IMREAD_GRAYSCALE)

dst = s_curve(img)
imshow(dst)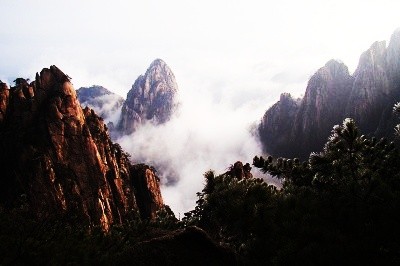
特定のチャンネルにだけ階調変換を適用する
cv2.split() でチャンネルごとに分解した後、グレースケール画像と同様に cv2.LUT() で階調変換を行い、cv2.merge() でチャンネルを結合してカラー画像に戻します。
def gamma_correction(img, gamma):
    x = np.arange(256)
    y = (x / 255) ** gamma * 255

    dst = cv2.LUT(img, y).astype(np.uint8)

    return dst


# 画像をチャンネルごとに分解する。
b, g, r = cv2.split(img)

# 青のチャンネルを明るくする
b = gamma_correction(b, gamma=0.5)

# チャンネルを結合して画像にする。
dst = cv2.merge([b, g, r])
imshow(dst)
疑似カラー
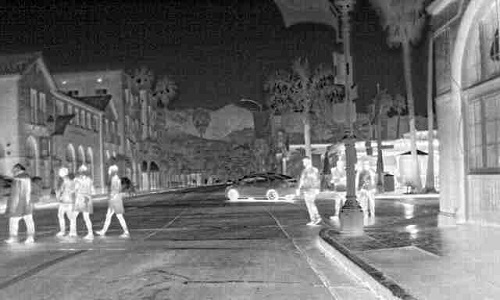
グレースケール画像に対して、3 つの異なる階調変換を行い、それらを統合してカラー画像にすることで、擬似的にグレースケール画像をカラー画像にすることができます。これを疑似カラーといいます。例えば、グレースケールの赤外線画像に色付けするのに使われます。
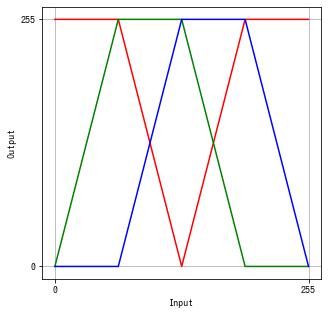
def colorize(img):
    # LUT テーブルを作成する。
    x = np.arange(256)
    by = np.interp(x, np.linspace(0, 255, 5), [0, 0, 255, 255, 0]).astype(np.uint8)
    gy = np.interp(x, np.linspace(0, 255, 5), [0, 255, 255, 0, 0]).astype(np.uint8)
    ry = np.interp(x, np.linspace(0, 255, 5), [255, 255, 0, 255, 255]).astype(np.uint8)

    b = cv2.LUT(img, by).astype(np.uint8)
    g = cv2.LUT(img, gy).astype(np.uint8)
    r = cv2.LUT(img, ry).astype(np.uint8)

    # チャンネルを結合して画像にする。
    dst = cv2.merge([b, g, r])

    return dst


img = cv2.imread("sample2.jpg", cv2.IMREAD_GRAYSCALE)
dst = colorize(img)
imshow(dst)
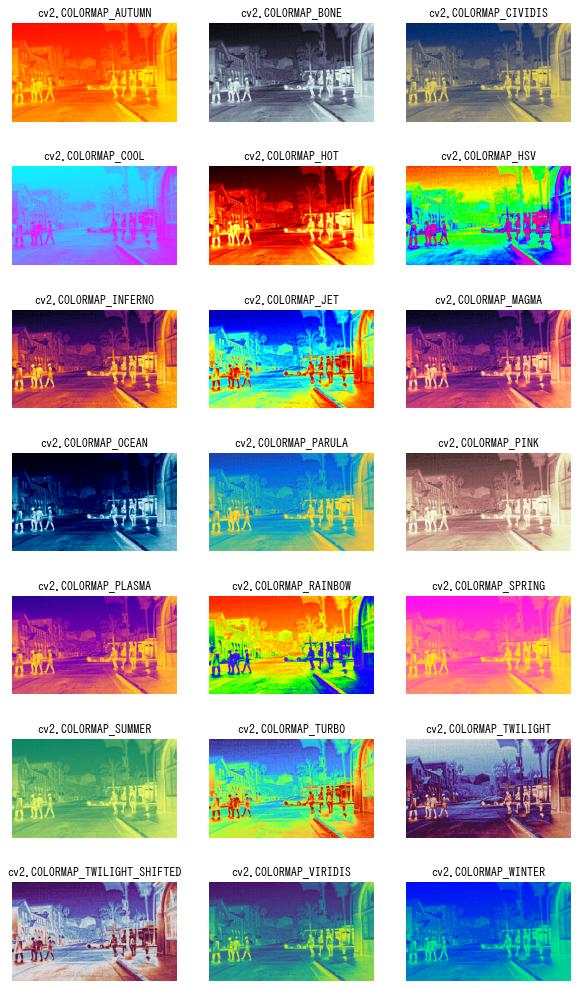
グレースケール画像の色付けは、cv2.applyColorMap() を使って行うこともできます。
これは、あらかじめ用意されたカラーマップの中から選んで適用することができます。
img = cv2.imread("sample2.jpg", cv2.IMREAD_GRAYSCALE)
dst = cv2.applyColorMap(img, cv2.COLORMAP_AUTUMN)
imshow(dst)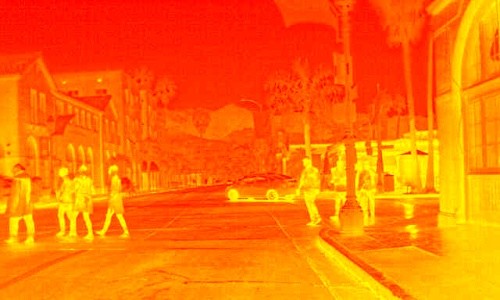
HSV に変換してから階調変換する
HSV 色空間は、色を色相 (Hue)、彩度 (Saturation)、明度 (Value) の 3 つの要素で表します。 画像を HSV 色空間に変換してから階調変換を行うことで、色合いや明るさを調整しやすくなります。
def gamma_correction(img, gamma):
    x = np.arange(256)
    y = (x / 255) ** gamma * 255

    dst = cv2.LUT(img, y).astype(np.uint8)

    return dst


# 画像を読み込む。
img = cv2.imread("sample.jpg")

# BGR -> HSV
hsv = cv2.cvtColor(img, cv2.COLOR_BGR2HSV)

# 画像をチャンネルごとに分解する。
h, s, v = cv2.split(hsv)

# 色相に対して、階調変換する。
h = gamma_correction(h, gamma=0.5)

# チャンネルを結合して画像にする。
hsv = cv2.merge([h, s, v])

# HSV -> BGR
dst = cv2.cvtColor(hsv, cv2.COLOR_HSV2BGR)

imshow(dst)


コメント