
目次
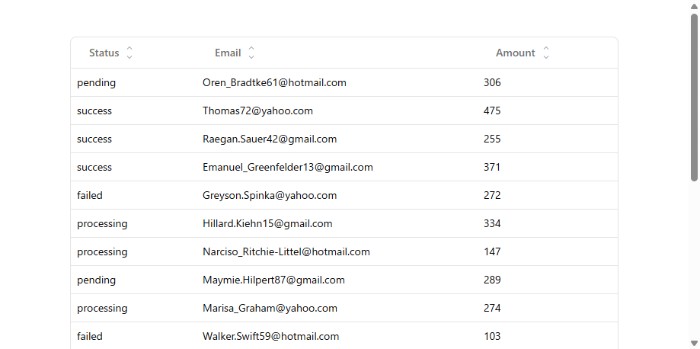
概要
shadcn/ui の Table コンポーネントにソート機能を実装する方法を解説します。
前提
以下のコードは React – shadcn/ui の Table コンポーネントについて解説 | pystyle で作成した動的なテーブルの実装の機能追加になります。 まず、上記のページでテーブルを実装し、そのコードに以下のコードを追加してください。
ソート機能を実装する
1. Button コンポーネントを追加
ページ遷移ボタンの実装には、Button コンポーネントを使用するため、インストールします。
npx shadcn@latest add button2. ソート機能付きのヘッダコンポーネントを作成
src/payment/column-header.tsx を作成します。
- ヘッダの項目をクリックすると、ソート状態が変更されるようにボタンにします。
- クリックした場合、
column.toggleSorting()を実行して、ソート状態を変更します。 - 現在のソート状態がわかるように、ヘッダのテキストの右側に △▽ を追加します。
column.getIsSorted()で現在のソート状態を取得し、昇順の場合は △、降順の場合は ▽ を強調表示します。
src/payment/column-header.tsx
import { Column } from "@tanstack/react-table";
import { ChevronDown, ChevronUp } from "lucide-react";

import { cn } from "@/lib/utils";
import { Button } from "@/components/ui/button";

interface DataTableColumnHeaderProps<TData, TValue>
  extends React.ComponentProps<typeof Button> {
  column: Column<TData, TValue>;
  title: string;
}

export function DataTableColumnHeader<TData, TValue>({
  column,
  title,
  className,
}: DataTableColumnHeaderProps<TData, TValue>) {
  if (!column.getCanSort()) {
    return <div className={cn(className)}>{title}</div>;
  }

  return (
    <Button
      className={cn("hover:bg-transparent", className)}
      variant="ghost"
      onClick={() => column.toggleSorting()}
    >
      {title}
      <div className="flex flex-col items-center">
        <ChevronUp
          className={cn(
            "size-3",
            column.getIsSorted() === "asc" ? "text-black" : "text-gray-400"
          )}
        />
        <ChevronDown
          className={cn(
            "size-3",
            column.getIsSorted() === "desc" ? "text-black" : "text-gray-400"
          )}
        />
      </div>
    </Button>
  );
}
3. カラム定義を変更する
src/payment/columns.tsx
import { ColumnDef } from "@tanstack/react-table";
import { DataTableColumnHeader } from "./column-header";

export type Payment = {
  id: string;
  amount: number;
  status: "pending" | "processing" | "success" | "failed";
  email: string;
};

export const paymentColumns: ColumnDef<Payment>[] = [
  {
    accessorKey: "status",
    header: ({ column }) => (
      <DataTableColumnHeader column={column} title="Status" />
    ),
  },
  {
    accessorKey: "email",
    header: ({ column }) => (
      <DataTableColumnHeader column={column} title="Email" />
    ),
  },
  {
    accessorKey: "amount",
    header: ({ column }) => (
      <DataTableColumnHeader column={column} title="Amount" />
    ),
  },
];
4. ソート機能の追加
テーブルを実装した src/payment/payment-table.tsx を以下のように変更します。
src/payment/payment-table.tsx
import {
  ColumnDef,
  flexRender,
  getCoreRowModel,
  getSortedRowModel,
  SortingState,
  useReactTable,
} from "@tanstack/react-table";

import {
  Table,
  TableBody,
  TableCell,
  TableHead,
  TableHeader,
  TableRow,
} from "@/components/ui/table";
import React from "react";

interface PaymentTableProps<TData, TValue> {
  columns: ColumnDef<TData, TValue>[];
  data: TData[];
}

export function PaymentTable<TData, TValue>({
  columns,
  data,
}: PaymentTableProps<TData, TValue>) {
  const [sorting, setSorting] = React.useState<SortingState>([]); // 追加

  const table = useReactTable({
    data,
    columns,
    getCoreRowModel: getCoreRowModel(),
    getSortedRowModel: getSortedRowModel(), // 追加
    onSortingChange: setSorting, // 追加
    state: {
      sorting, // 追加
    },
  });

  return (
    <div className="border rounded-md">
      <Table>
        {/* Header */}
        <TableHeader>
          {table.getHeaderGroups().map((headerGroup) => (
            <TableRow key={headerGroup.id}>
              {headerGroup.headers.map((header) => (
                <TableHead key={header.id}>
                  {header.isPlaceholder
                    ? null
                    : flexRender(
                        header.column.columnDef.header,
                        header.getContext()
                      )}
                </TableHead>
              ))}
            </TableRow>
          ))}
        </TableHeader>

        {/* Body */}
        <TableBody>
          {table.getRowModel().rows?.length ? (
            // データが存在する場合
            table.getRowModel().rows.map((row) => (
              <TableRow
                key={row.id}
                data-state={row.getIsSelected() && "selected"}
              >
                {row.getVisibleCells().map((cell) => (
                  <TableCell key={cell.id}>
                    {flexRender(cell.column.columnDef.cell, cell.getContext())}
                  </TableCell>
                ))}
              </TableRow>
            ))
          ) : (
            // データが存在しない場合
            <TableRow>
              <TableCell colSpan={columns.length} className="h-24 text-center">
                データなし
              </TableCell>
            </TableRow>
          )}
        </TableBody>
      </Table>
    </div>
  );
}
解説
詳しくは Sorting Guide | TanStack Table Docs を参照してください。
ソート状態を管理するための state を作成し、table のソート状態と連携します。
- onSortingChange: テーブルのソート状態が変更された場合に呼ばれるコールバック関数を設定します。
- state.sorting: ソート状態を管理する state を設定します。
- getSortedRowModel: ソート状態に応じた行モデルを取得する関数を設定します。
const [sorting, setSorting] = React.useState<SortingState>([]); // 追加

const table = useReactTable({
  data,
  columns,
  getCoreRowModel: getCoreRowModel(),
  getSortedRowModel: getSortedRowModel(), // 追加
  onSortingChange: setSorting, // 追加
  state: {
    sorting, // 追加
  },
});
コメント