概要
dlib を使った Python の顔認識ライブラリ Face Recognition を使って、画像から顔がある領域を特定する顔検出を行う方法について紹介します。
環境
コード全体は GitHub にあります。
このコードは、以下の環境で実行しました。
- OS
- Ubuntu: 16.04
- ライブラリ
- Face Recognition: 1.2.3
- GPU の実行環境
- GPU: GeForce GTX 1080
- CUDA: 9.0
- CuDNN: 7
- CPU の実行環境
- CPU: Intel(R) Core(TM) i7-6700K CPU @ 4.00GHz
- メモリ: 16G
インストール
インストール時に Face Recognition が利用している dlib のビルドが必要になります。
dlib をビルドできる環境が整っていない場合、その際に失敗してしまうので、先に C++ のビルド環境及び CMake をインストールします。
Ubuntu の場合、apt で導入できます。
apt install -y build-essential cmakeWindows の場合、Visual Studio 及び CMake が必要になると思いますが、具体的な手順は試してないのでわかりません。
windowsでdlibインストールで詰まったときに – Qiita
準備ができたら、pip で Face Recognition をインストールします。
pip install face_recognition画像から顔を検出する
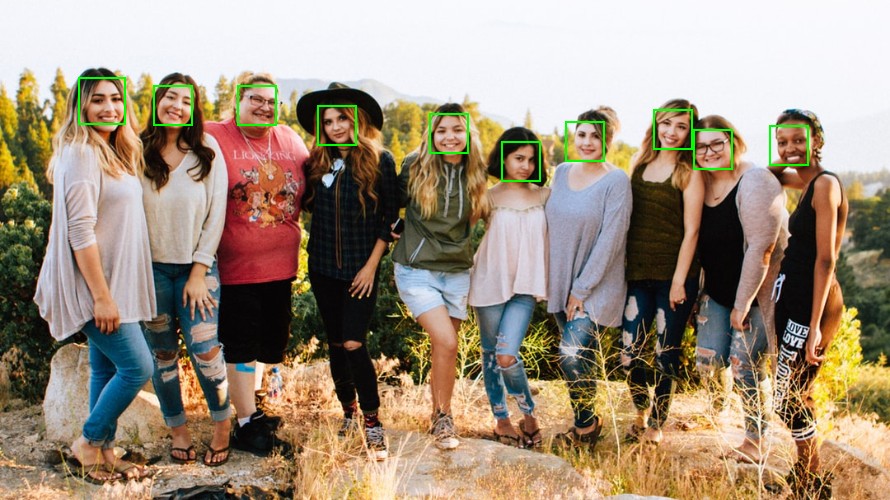
以下を検出対象の画像とします。
load_image_file() で画像を読み込みます。
import face_recognition
import matplotlib.pyplot as plt

# 画像を読み込む。
img = face_recognition.load_image_file("sample.jpg")
face_locations() で読み込んだ顔の画像から、顔の領域を検出します。 返り値は顔の領域を表す (top, right, bottom, left) の tuple の list になっています。
face_recognition.face_locations(img, number_of_times_to_upsample=1, model='hog')- 引数
- img: 検出対象の画像
- number_of_times_to_upsample: アップサンプリングを行う回数
- model: 検出に使用するモデル
# 画像から顔の領域を検出する。
face_locs = face_recognition.face_locations(img, model="cnn", number_of_times_to_upsample=2)結果を確認するために、Pillow で顔の領域を画像上に描画します。
from PIL import ImageDraw, Image
from IPython.display import display

def draw_faces(img, locs):
    img = Image.fromarray(img)
    draw = ImageDraw.Draw(img, mode="RGBA")

    for top, right, bottom, left in locs:
        draw.rectangle((left, top, right, bottom), outline="lime", width=2)

    display(img)


draw_faces(img, face_locs)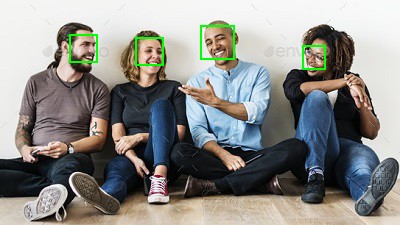
画像から顔の領域が正しく検出できていることがわかりました。
model は検出に使用するモデルを指定します。
“hog” (デフォルト) を指定した場合、HOG 特徴量 ベースのモデルになります。
“cnn” を指定した場合、CNN ベースのモデルになります。
| HOG | CNN | |
|---|---|---|
| 計算量 | 少ない | 多い |
| 精度 | 中 | 高 |
CNN のほうが高精度ですが、計算量が多く、CPU で実行した場合は時間がかかってしまいます。GPU が使える PC ではこちらを選択するとよいでしょう。
number_of_times_to_upsample は画像をアップサンプリングする回数です。
アップサンプリングを行うことで小さい顔も検出できるようになりますが、その分計算量が増えてしまうため、デフォルトの値で検出できない場合は値を2や3に増やしてください。
import face_recognition
import matplotlib.patches as mpatches
import matplotlib.pyplot as plt
import numpy as np

# 画像を読み込む。
img = face_recognition.load_image_file("sample2.jpg")

# HOG 特徴量を使った顔検出
locs = face_recognition.face_locations(img, model="hog")
draw_faces(img, locs)

# CNN を使った顔検出
locs = face_recognition.face_locations(img, model="cnn")
draw_faces(img, locs)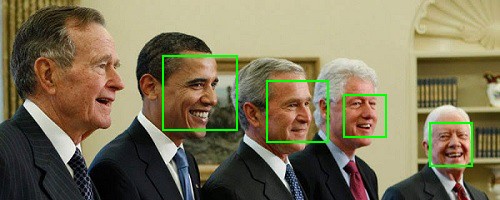
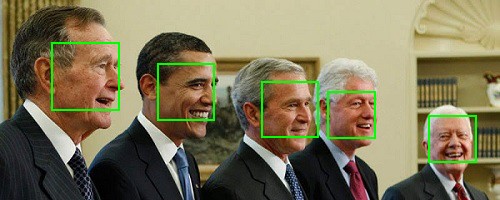
HOG 特徴量を使ったモデルでは検出できていなかった顔が CNN を使ったモデルでは検出できていることがわかります。
画像から顔の各部位を検出する
face_landmarks() で画像から鼻、眉毛、唇など顔を認識する上で重要となる以下の部位 (facial landmark) を検出できます。
| 英語 | 日本語 |
|---|---|
| nose_bridge | 鼻筋 |
| nose_tip | 鼻先 |
| top_lip | 上唇 |
| bottom_lip | 下唇 |
| left_eye | 左目 |
| right_eye | 右目 |
| left_eyebrow | 左眉毛 |
| right_eyebrow | 右眉毛 |
| chin | 下顎 |
face_recognition.face_landmarks(face_image, face_locations=None)- 引数
- face_image: 画像
- known_face_locations: face_locations() の返り値 locations を渡します。
返り値は [顔1の情報, 顔2の情報, ...] という list となっています。
各要素はキーが部位名、値が画像上の座標の list である dict となっています。
顔 i の情報 = {'パーツ名': [(x, y), (x, y), ...], 'パーツ名': [(x, y), (x, y), ...], ...}from pprint import pprint
import face_recognition
import matplotlib.pyplot as plt
import numpy as np
# 画像を読み込む。
img = face_recognition.load_image_file("sample3.jpg")
# 画像から顔の領域を検出する。
face_locs = face_recognition.face_locations(img, model="cnn")
# 顔の各部位を検出する。
facial_landmarks = face_recognition.face_landmarks(img, face_locs)
#pprint(facial_landmarks)
# 日本語訳
jp_names = {'nose_bridge': '鼻筋',
'nose_tip': '鼻先',
'top_lip': '上唇',
'bottom_lip': '下唇',
'left_eye': '左目',
'right_eye': '左目',
'left_eyebrow': '左眉毛',
'right_eyebrow': '右眉毛',
'chin': '下顎'}
# 可視化する。
fig, ax = plt.subplots(figsize=(7, 7))
ax.imshow(img)
ax.set_axis_off()
for face in facial_landmarks:
for name, points in face.items():
points = np.array(points)
ax.plot(points[:, 0], points[:, 1], 'o-', ms=3, label=jp_names[name])
ax.legend(fontsize=14)
plt.show()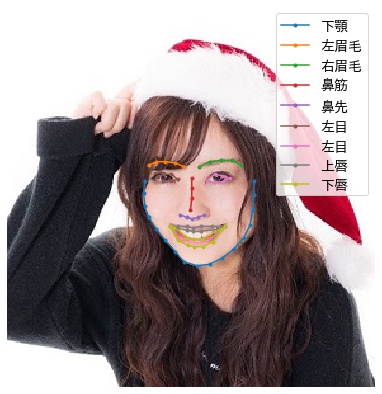



コメント